In the Users setting in Account Settings, Greenway Telehealth™ practice administrators are able to manage users across multiple rooms. This setting allows practice administrators to add and deactivate users from a variety of roles in your practice.
An authorized user is any user that has been added as an Active User in the Users tab whether the user is a Provider or Non-provider user.
An administrator is any user that has been assigned with the Administrator role when adding or editing users. Any user can be granted the role of Administrator.
In the Users setting, practice administrators are able to:
- View all rooms users have access to.
- View all users in those rooms.
- Add, edit, and deactivate Provider and Non-provider users.
- Assign user roles, and grant and remove access to virtual waiting rooms.
- Resend user invites
The roles Front Desk, Care Coordinator, Nurse/Medical Assistant, Back Office Staff, and Other are only intended to assist in user organization. Assigning any of these roles to a user does not grant permissions or have an affect on a user's permissions.
How to Get Here
Select Account Settings > Users in your virtual waiting room.
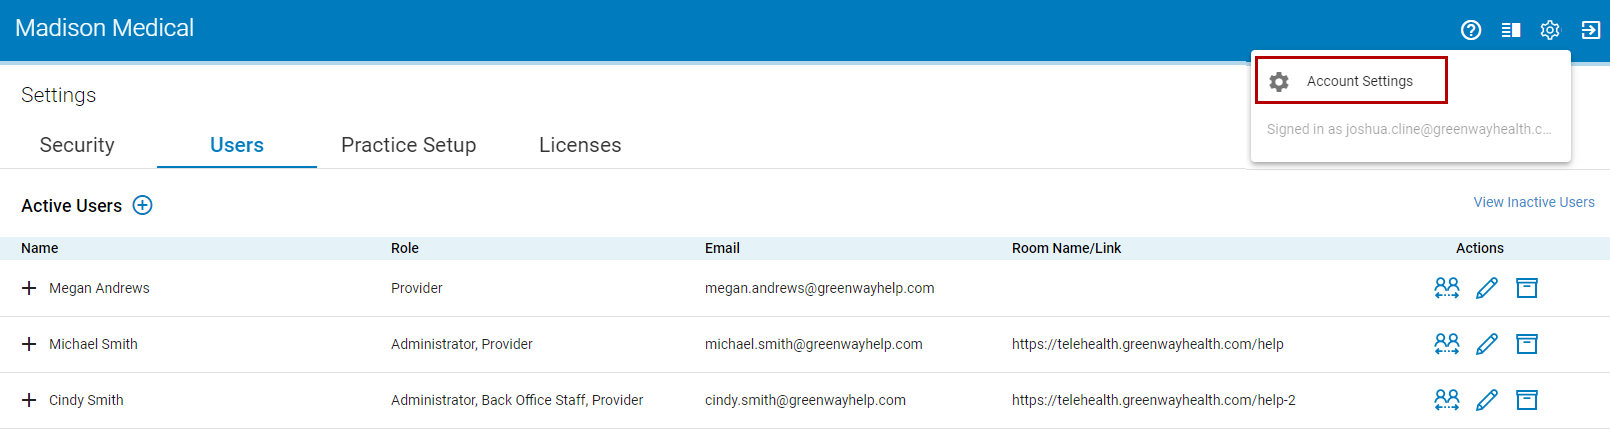
After selecting Account Settings, the Users, Practice Setup, and Licenses settings will not display if a user does not have administrator permissions.
Add a New Provider User
Administrators can add Provider users in the User tab. The following roles are available for Provider users: Administrator, Front Desk, Care Coordinator, Nurse/Medical Assistant, Back Office Staff, or Other.
Provider users are users that can have an E-room and use one of your practice's available licenses.
To add a new provider user:
| 1. | Select the plus icon |
| 2. | In the Add New User window, select the Provider radio button. |
| 3. | Enter a first and last name. |
| 4. | For Prime Suite clients, select a provider from the Provider drop down. |
| 5. | For Intergy clients, select a Practice and a Provider from the drop downs. |
These drop downs allow Greenway Telehealth to pull in a provider's appointment schedule from the EHR for appointment matching. In most cases, you will want to select the same provider in the drop down that you are adding as a new Provider user.
| 6. | Enter an email address for the user. |
| 7. | Enter Mobile Number. If you do not provide a valid mobile number, an error message will appear: “Please enter a valid 10-digit mobile number.” |
| 8. | Enter the Telehealth URL. |
This will be the E-Room name and URL. You cannot change the E-Room name and URL. If you need to change the name and URL, contact Greenway Support.
| 9. | Select a Role or multiple roles. |
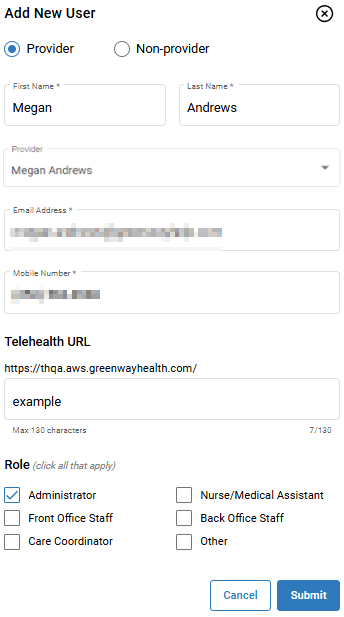
Prime Suite
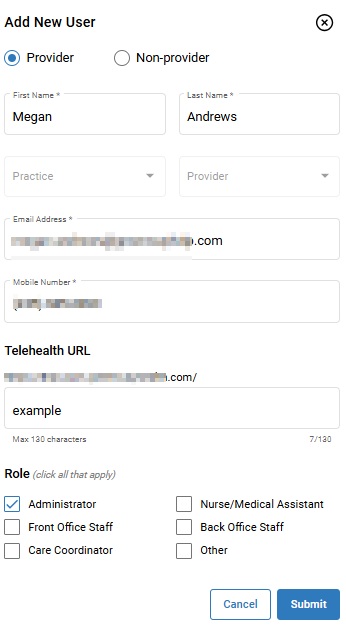
Intergy
| 10. | Select Submit when finished or Cancel to exit. |
Newly added providers will automatically be granted a license in the Licenses tab if a license is available. If you deactivate a Provider user to immediately add a New Provider user, you would have to add the new user in the Licenses tab. See the Licenses help topic for more information.
Add a New Non-provider User
Administrators can add Non-provider users in the User tab. Non-provider users do not require a license and cannot create E-rooms. However, Non-provider users can be granted access to a provider's E-room. See the Grant Access to a Waiting Room section for more information.
The following roles are available for Non-provider users: Administrator, Front Desk, Care Coordinator, Nurse/Medical Assistant, Back Office Staff, or Other. Any user added as a non-provider user will automatically be added to the practice of the currently logged in user.
The roles Front Desk, Care Coordinator, Nurse/Medical Assistant, Back Office Staff, and Other are only intended to assist in user organization. Assigning any of these roles to a user does not grant permissions or have an affect on a user's permissions.
To add a new Non-provider user:
| 1. | Select the plus icon next to Active Users |
| 2. | In the Add New User window, select the Non-provider radio button. |
| 3. | Enter a first and last name. |
| 4. | Enter an email address. |
| 5. | Enter Mobile Number. If you do not provide a valid mobile number, an error message will appear: “Please enter a valid 10-digit mobile number.” |
If a user's email address is already registered, you will see the following error: "Email address is already associated with another practice."
| 6. | Select a Role or multiple roles. |
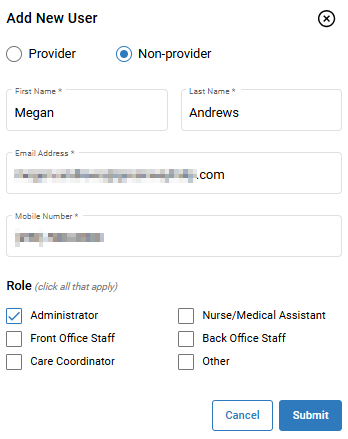
| 7. | Select Submit when finished or Cancel to exit. |
Grant Access to a Waiting Room
To grant a user access to a virtual waiting room. select the ![]() icon in the Actions column in the row of the provider's room that you want to grant a user access to. In the Grant Room Access window, administrators can select and add multiple users, search for users, filter users (by Providers, Non-Providers, users with access, and users without access), and assign user roles.
icon in the Actions column in the row of the provider's room that you want to grant a user access to. In the Grant Room Access window, administrators can select and add multiple users, search for users, filter users (by Providers, Non-Providers, users with access, and users without access), and assign user roles.
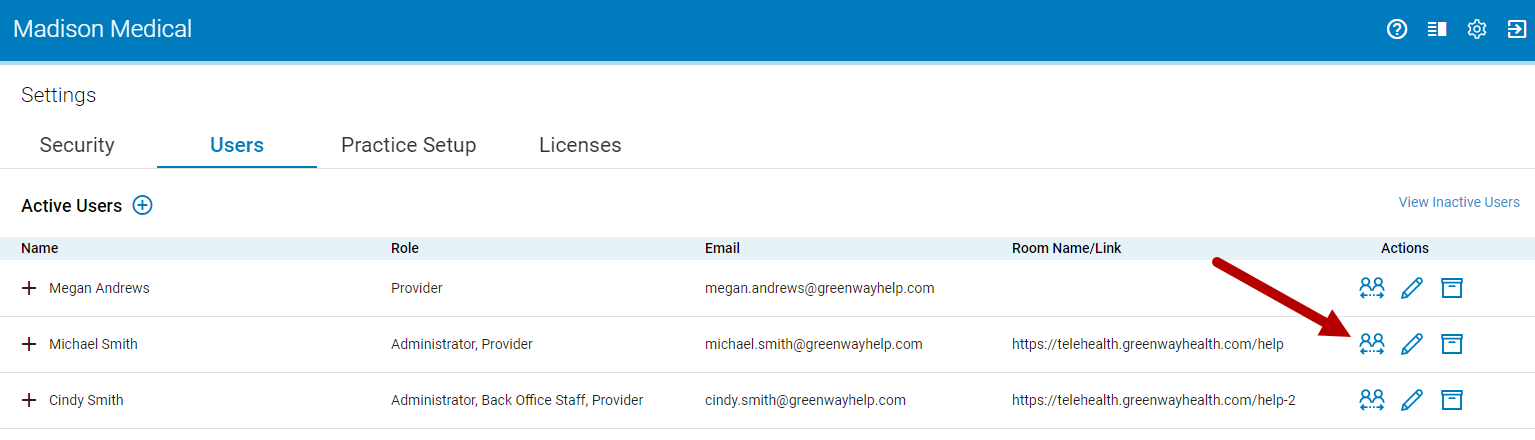
If a provider does not have a room name set, the ![]() icon will be grayed out and disabled. In order to grant access to this provider's room, the room name must be set.
icon will be grayed out and disabled. In order to grant access to this provider's room, the room name must be set.
Search and Filter
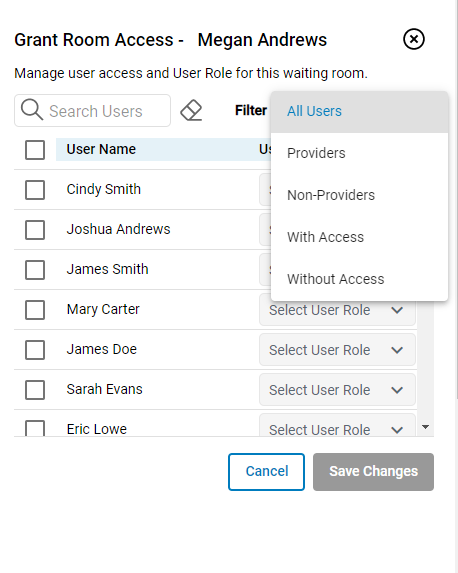
In the Grant Room Access window, administrators can search and filter users in the list.
To filter the list by Providers, Non-Providers, users With Access, and users Without Access, select the Filter dropdown and then select an option from the list. For example, selecting Providers will filter the list by Providers only.
To search for users in the list, enter at least one character into the Search Users search field. For example, to search for all users with the last name 'Smith' you would enter 'Smith' into the search field.

To clear the search field, select the Clear Selection icon ![]() .
.
Grant Users Access to a Room
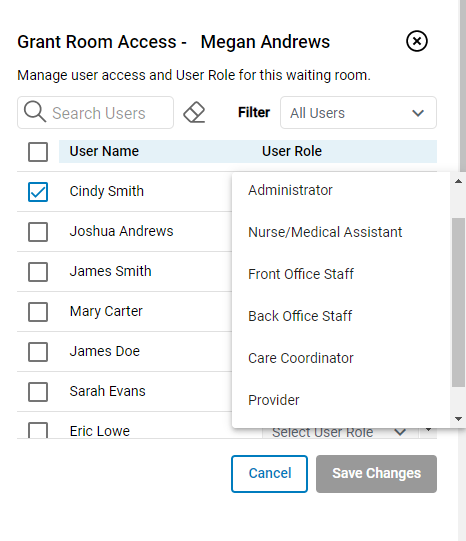
To grant a user or users access to a room, select the check box next to the user's name and then select the user's role (Administrator, Nurse/Medical Assistant, Front Office Staff, Back Office Staff, Care Coordinator, Provider, or Other).
The Select User Role dropdown is enabled only after you select a user.
Select Save Changes to grant room access to the selected users. Select Cancel to exit.
The Save Changes button is disabled until each selected user has been assigned a role.
Remove Access to a Waiting Room
To remove a user's waiting room access:
| 1. | Select the |
| 2. | In the row of the user you want to delete, select the trash can icon |
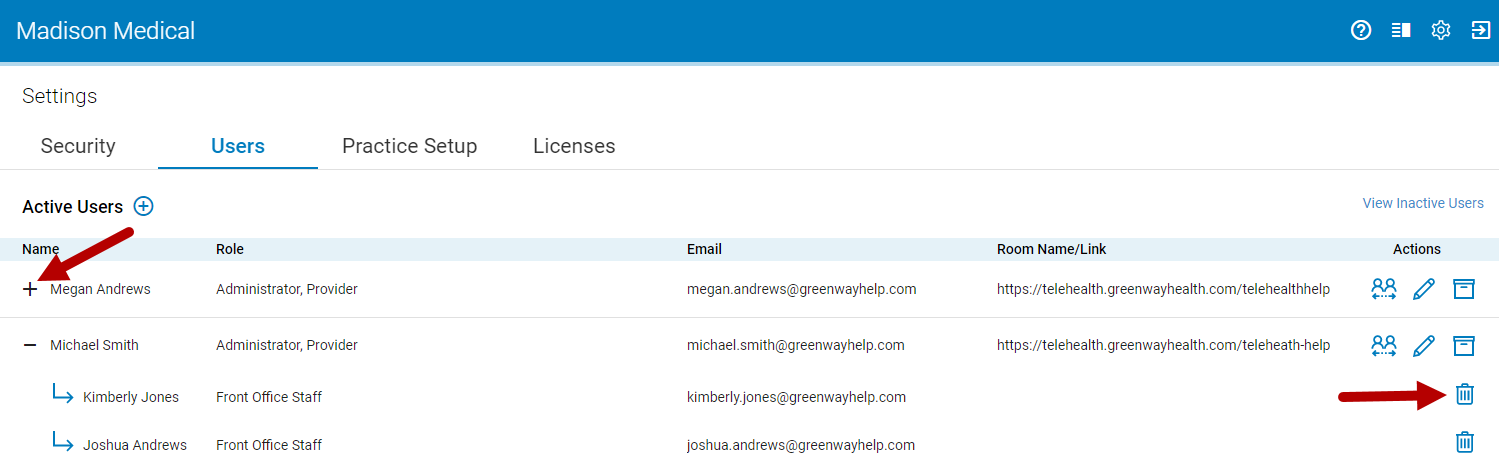
| 3. | In the prompt, select the Remove Access button to remove the user, or Cancel to exit. |
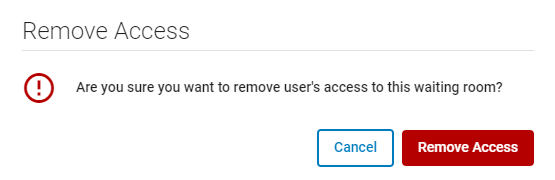
| 4. | After selecting Remove Access you will see the following confirmation: |

| 5. | The user will then no longer have access to patients for that provider and the link to that provider's room will be removed from the user's waiting room. |
Edit a User
If you need to edit a user's name, email address, role, switch a user to a Provider or Non-provider user, or select a new Provider
| 1. | Select the pencil icon |
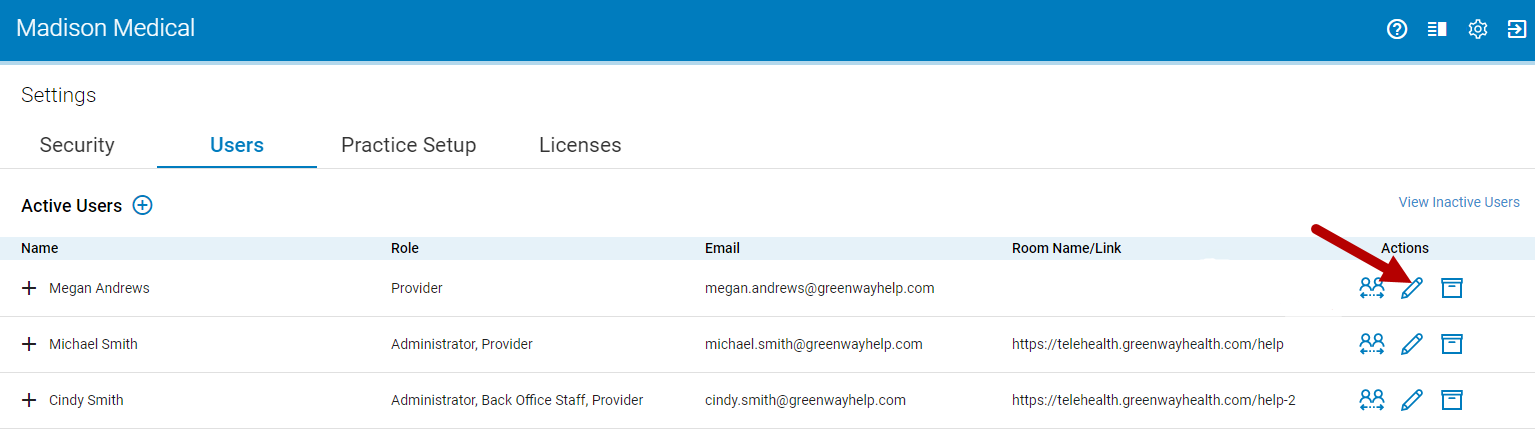
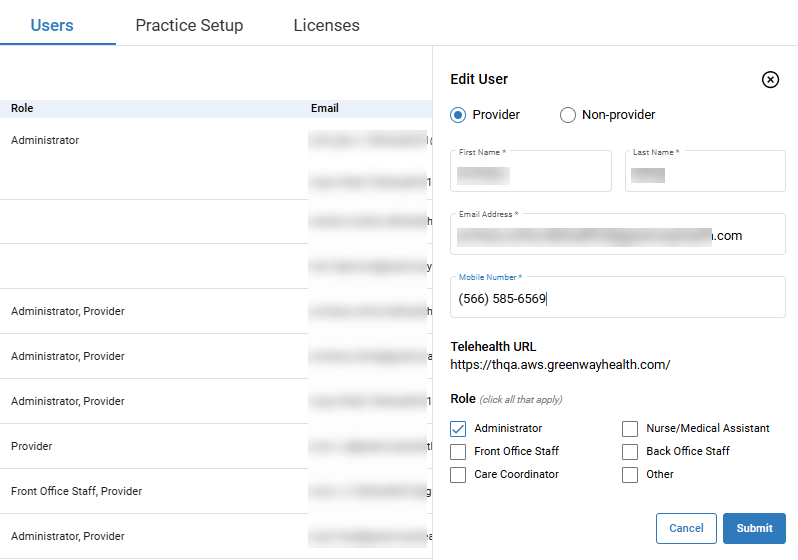
| 2. | Select either the Provider or Non-provider radio button if necessary. |
After selecting the pencil icon, the Provider and Non-provider radio button will default to the user's current selection.
| 3. | Update the user's name, email address, mobile number, and role(s) as necessary. |
-
The Mobile Number field is editable and can be updated as needed.
-
If the mobile number entered is invalid or not in the correct format, an error message is displayed.
| 4. | For Provider users you can also updated the Provider drop down. |
| a. | For Prime Suite clients, select a provider from the Provider drop down. |
| b. | For Intergy clients, select a Practice and a Provider from the drop downs. |
These drop downs allow Greenway Telehealth to pull in a provider's appointment schedule from the EHR for appointment matching. In most cases, you will want to select the same provider in the drop down that you are adding as a new Provider user.
| 5. | Select the Submit button or Cancel to exit the window. |
The room name cannot be edited. If you need to update the room name and room URL, contact Greenway Support.
Switching user from Non-provider to Provider Users & Provider to Non-provider Users
Whenever a Non-provider user is switched to a Provider user, the newly created Provider user will be prompted to create an E-room at the user's next login.
Additionally, the newly created Provider user will automatically use one of your practices licenses (if any licenses are available) in the Licenses tab. If no licenses are available, a license will need to be transferred from another user or additional licenses will need to be purchased. In this case, the following prompt will display:

Whenever a Provider user is switched to a Non-provider user, the previous Provider user's license becomes available in the Licenses tab and the previous Provider user's waiting room will no longer be available.
Deactivate a User
Deactivating a user removes the user's access to Greenway Telehealth. Deactivating users may be used for a variety of reasons in your practice. For example, a user is no longer employed at your practice or to temporarily deactivate a user on sabbatical. Deactivating a user in the Users tab is not permanent. Deactivated users can be reactivated at any time.
To deactivate a user:
| 1. | Select the deactivate icon |
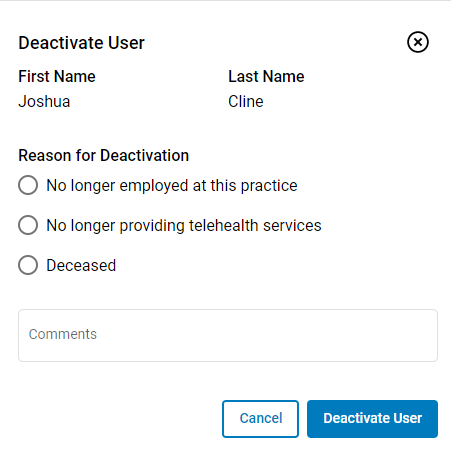
| 2. | Select an option in the Reason for Deactivation section and optionally add comments. |
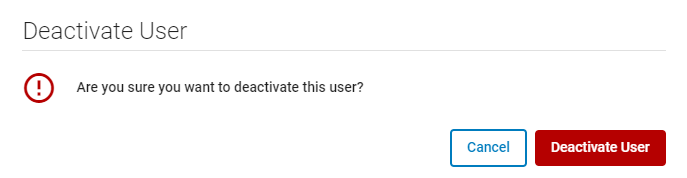
| 3. | To deactivate the user select the Deactivate User button or Cancel to exit. |
| 4. | Select the Deactivate User button in the prompt or Cancel to return to the Deactivate User window. |
| 5. | After selecting Deactivate User you will see the following confirmation: |

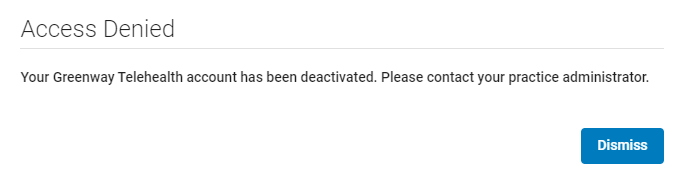
If a deactivated user attempts to log into Greenway Telehealth, the following prompt appears:
View Inactive Users & Reactivate a User
To reactivate a user:
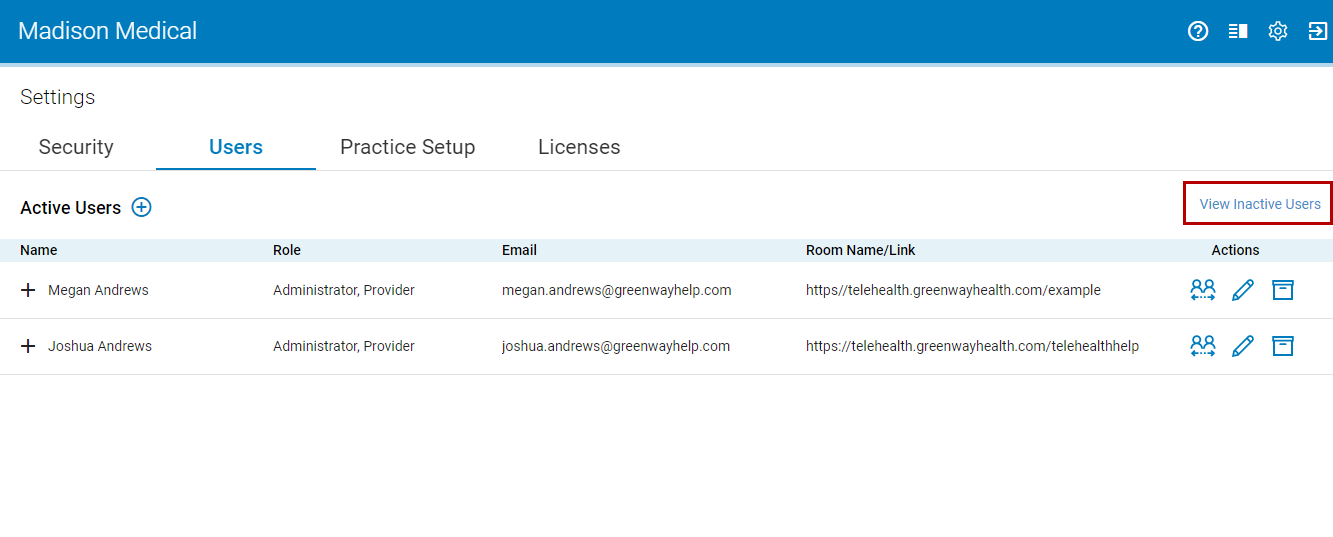
| 1. | Select View Inactive Users on the right side of the page. |
| 2. | In the Inactive Users list, select the reactivate icon |

For Non-provider users, selecting the plus icon ![]() next to the user's name will show all the rooms that the user has access to (if any). For Provider users selecting the
next to the user's name will show all the rooms that the user has access to (if any). For Provider users selecting the ![]() next to an inactive Provider user's name will show all the users that have access to that Provider user's waiting room for that provider. If no authorized users exist, you will see: "There are no authorized users for this provider."
next to an inactive Provider user's name will show all the users that have access to that Provider user's waiting room for that provider. If no authorized users exist, you will see: "There are no authorized users for this provider."

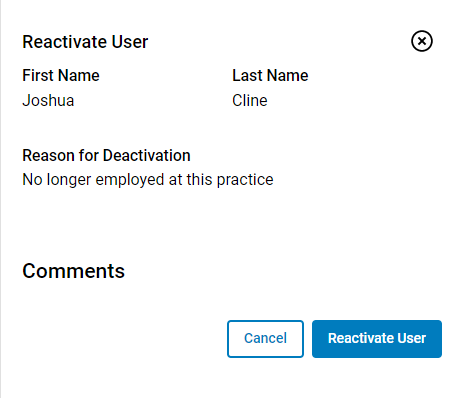
| 3. | In the Reactivate User window select the Reactivate User button or Cancel to exit the window. |
| 4. | After selecting Reactivate User you will see the following confirmation: |

| 5. | The reactivate user appears in the Active User list with the same role(s) and room access as previously set. |
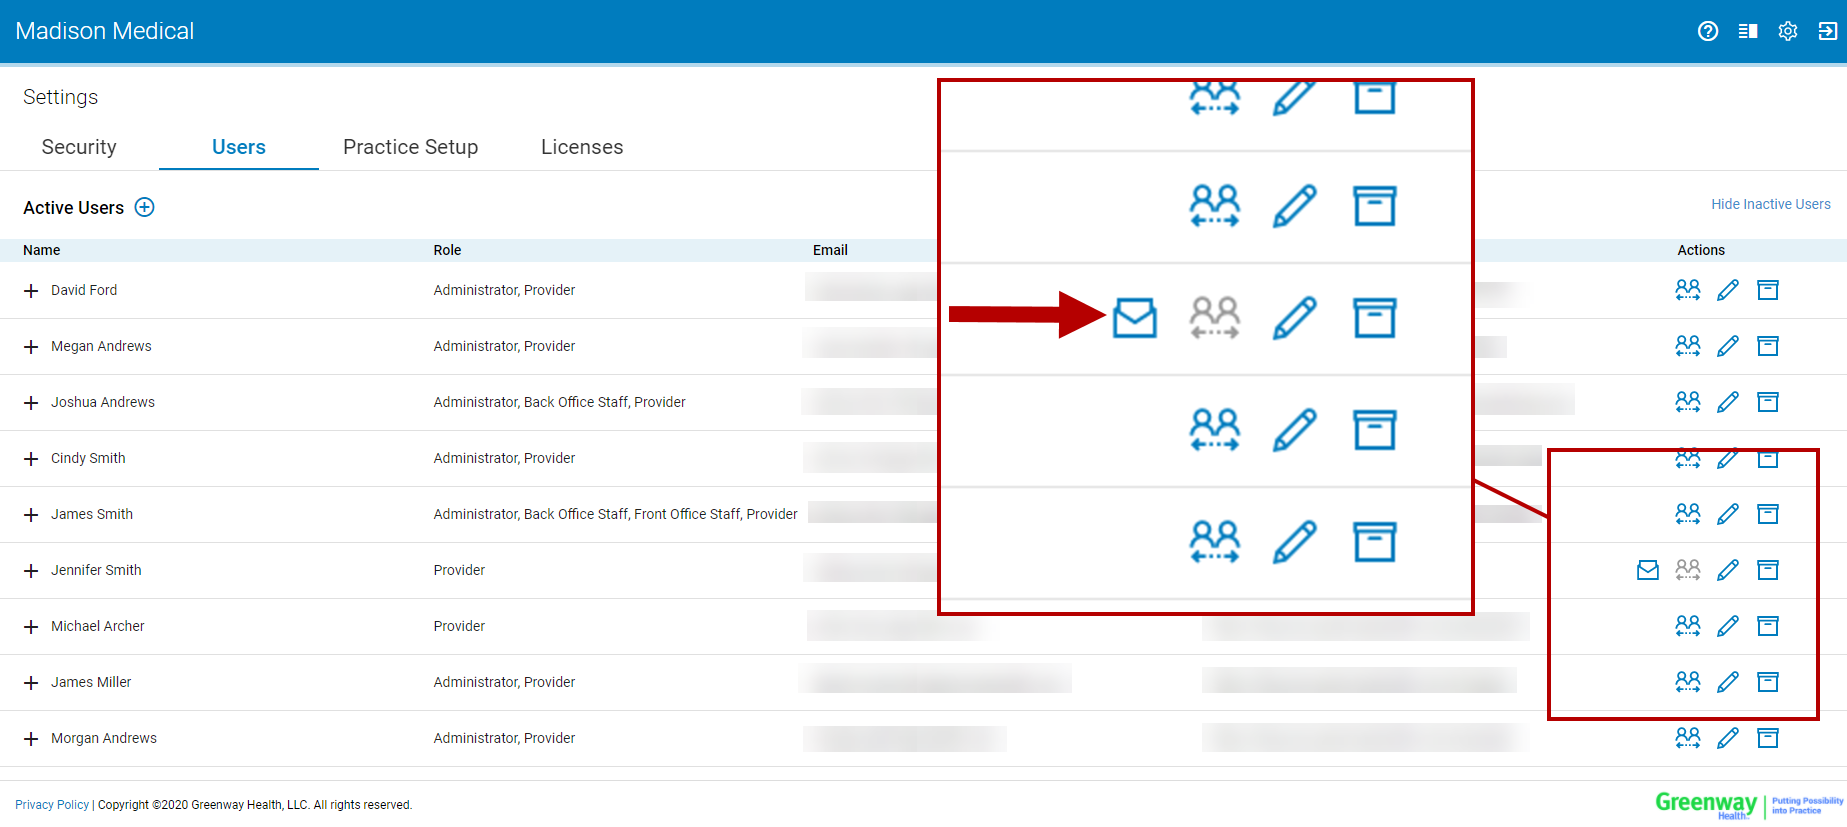
Resend an Invite
If a practice sends a user an invite and the user does not register with Greenway Telehealth within 7 days, administrator users can now resend the invite in Account Settings > Users by selecting the email icon in the Actions column.
The email icon appears only if an invite was sent to a user and the user has not registered.
If an invite is successfully sent, you will see "Invite successfully sent." If the invite fails to send, you will see "Invite failed to send. Please try again later."
Selecting the email icon multiple times will send multiple invite emails to the user.

