Adding a Greenway Telehealth™ URL to a GPM Message
Greenway Telehealth™ clients with Greenway Patient Messaging can add virtual waiting room URLs to resources, locations, and appointment types. This allows Greenway Telehealth™ clients to include a provider's virtual waiting room URL in an appointment or appointment broadcast message .
Add a Room URL to a Resource, Location, or Appointment Type
Prior to being able to add a virtual waiting room URL to an appointment or appointment broadcast message, you must first add the room URL to a Resource, Location, or Appointment Type.
Which setting your practice decides to add a virtual waiting room URL to depends on how your practice organizes appointment and appointment broadcast notices and Greenway Telehealth™. For example, if all users at a practice location use one virtual waiting room, you may want to add the virtual waiting room URL to that location only. Or, your practice may have a different virtual waiting room for each of your providers. In this case, you would add a different virtual waiting room URL to each provider in Settings.
To do so:
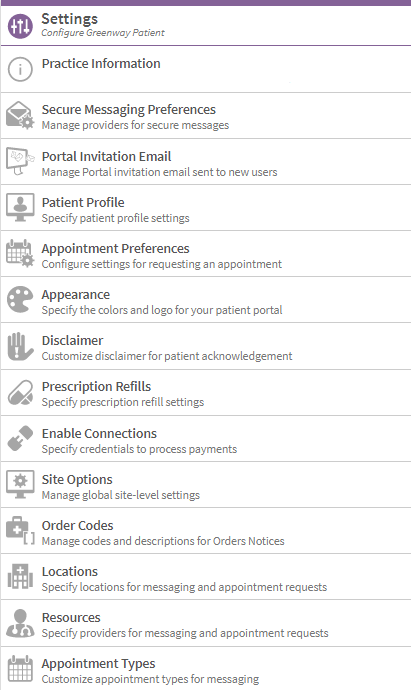
| 1. | Select either the Location, Resources, or Appointment Types from the Settings widget on the Admin Dashboard, or from the Settings panel. |
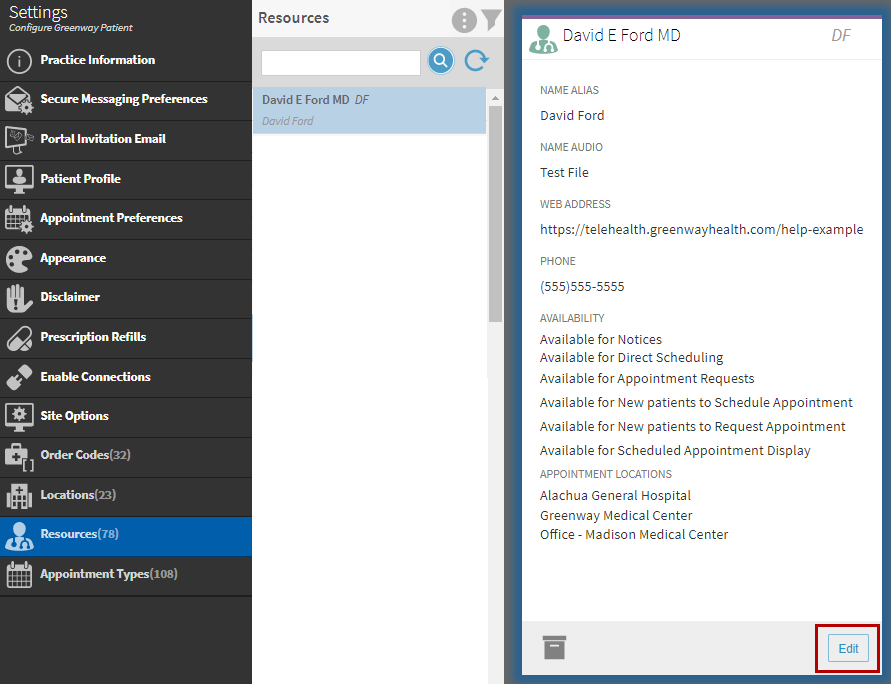
| 2. | Select a resource, location, or appointment type from the list or use the search bar to search for a location, resource, or appointment type. |
| 3. | Select Edit in information card. |
| 4. | Select Web Address and then enter a waiting room URL into the web address field. |
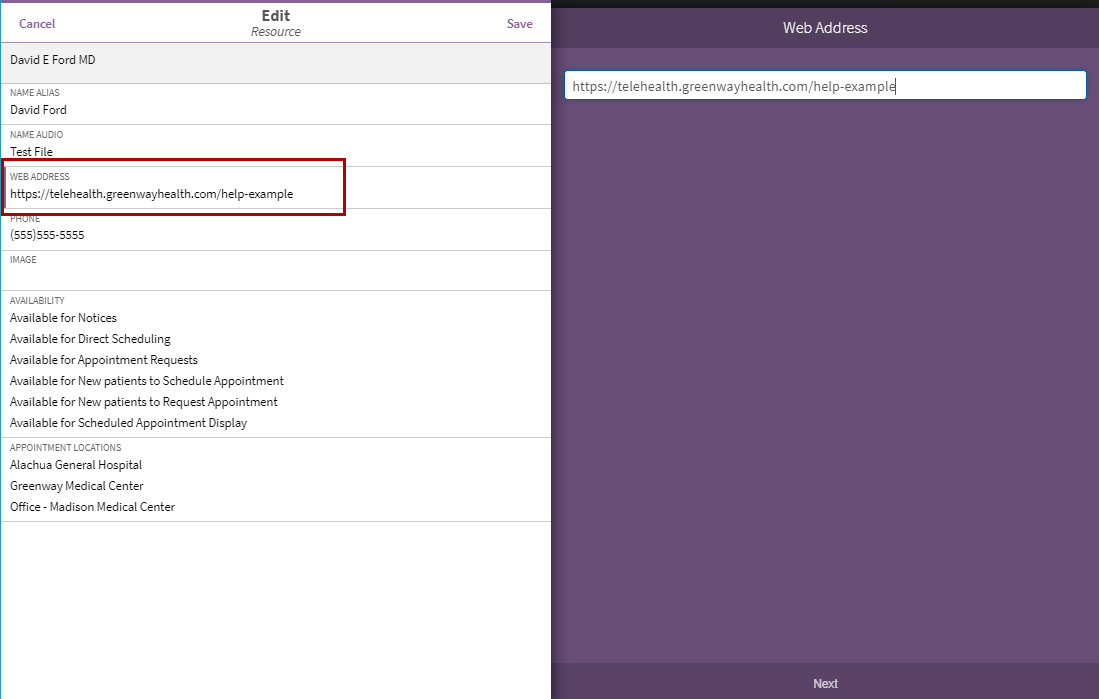
| 5. | Select Save. |
| 6. | Repeat these steps for each location, resource, or appointment type as needed. |
Create an Appointment or Appointment Broadcast Message
After entering a waiting room URL in a location, resource, or appointment type, you can now create appointment and appointment broadcast messages with a virtual waiting room URL.
The following instructions use Appointment messages as an example, however, these instructions also apply to Appointment Broadcast messages.
| 1. | Select an existing appointment notice or create a new one. |
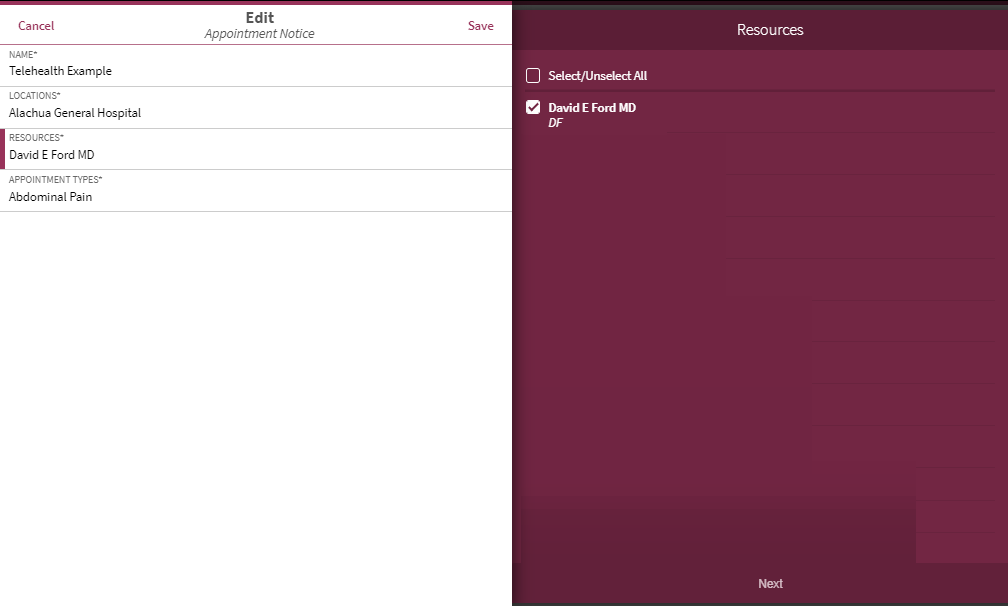
| 2. | When creating or editing an appointment notice, be sure to add a location, resource, or appointment type that includes the virtual waiting room URL in the Web Address field (see above). |
For example, if a waiting room URL was entered in the Web Address field for David Ford in the Resources setting, then David Ford should be selected as a resource in the Resources field when creating or editing an appointment notice for telehealth.
| 3. | After editing an existing notice or creating a new notice, select the Messages tab and then select either Text, Voice, or Email. |
| 4. | In the text, voice, or email message window, select a language, a delivery time, and response prompts (if necessary). |
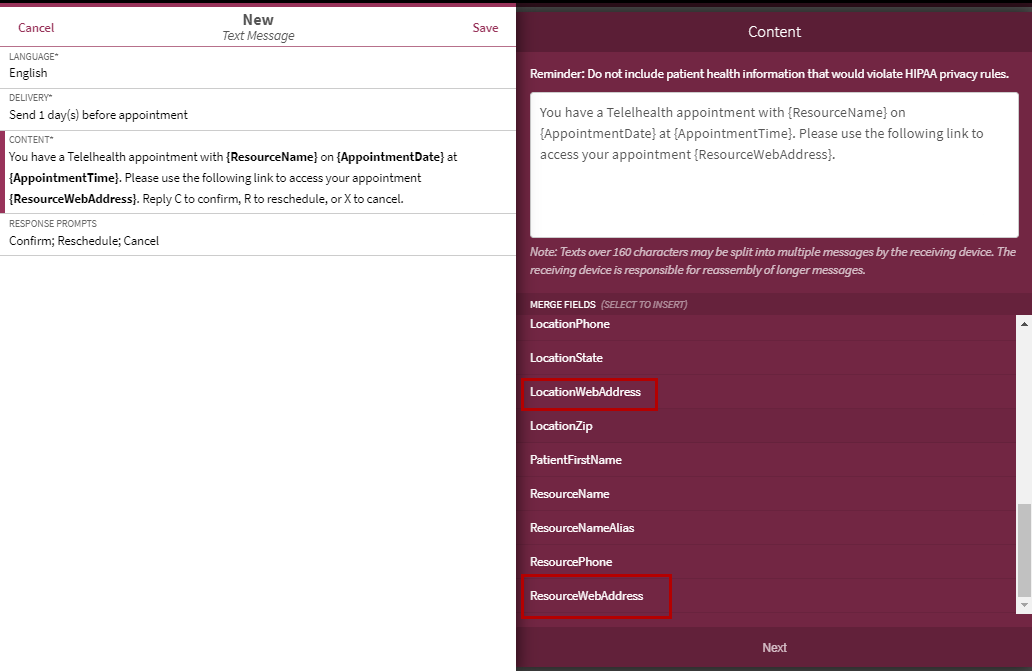
| 5. | In the Content section, enter the content of the message and include any of the following merge fields: |
- ResourceWebAddress
- AppointmentTypeWebAddress
- LocationWebAddress
For example, a Telehealth text message with merge fields might look like the following:
You have a Telehealth appointment with {ResourceName} on {AppointmentDate} at {AppointmentTime}. Please use the following link to access your appointment: {ResourceWebAddress}.
| 6. | Select Save. |
| 7. | Repeat these steps for each Appointment or Appointment Broadcast notice that you wish to create a GPM Telehealth message. |